How much does PCB assembly cost?
If you’re developing an electronic product, one of the most critical questions is: “How much does PCB assembly cost?” Getting a clear, upfront answer can be challenging because PCBA pricing isn’t a single number—it’s the sum of several distinct factors.
Understanding this breakdown is key to budgeting effectively and choosing the right manufacturing partner. In this guide, we will transparently break down every element that contributes to the final PCB assembly cost, empowering you to make informed decisions.
The Four Core Components of PCBA Pricing
Typically, the total cost for having your board assembled consists of the following:
PCB Fabrication Cost
Component Procurement Cost
SMT & Through-Hole Assembly Cost
Testing & Final Assembly Cost
Let’s dive into the details of each.
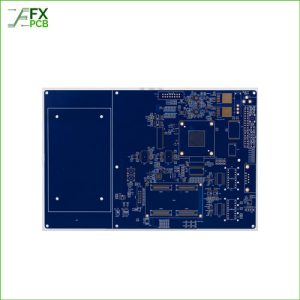
1. PCB Fabrication Cost
If you are providing your own bare boards, this cost is zero. If you need your assembler to source or fabricate the PCBs, the cost depends entirely on the board’s complexity.
Key factors influencing PCB cost:
Layer Count: A standard Single layer and 2-layer board is the most economical. 4-layer, 8-layer, or higher-layer counts increase the price significantly.
Base Material: FR-4 is standard. Specialized materials like metal core substrate, Rogers, or flexible PCBs cost more.
- PCB Specification: copper thickness, board thickness and the surface treatment …
Manufacturing Complex: The trace width and space are small, BGA chips with very small spacing between pins and others.
2. Component Procurement Cost
This is often the most significant variable in your PCBA budget. If you supply all components (Consigned Parts), you avoid this cost. In a “Turnkey” service, where the assembler purchases all parts, this cost includes:
The unit price of each component from distributors.
A material coverage fee, typically around 3-5%. This covers losses due to reel remnants, spoilage during setup, and SMT placement errors. This fee is crucial for ensuring the assembler has enough components to complete your order without stoppages.
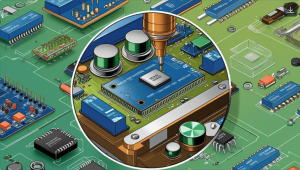
3. SMT & Through-Hole Assembly Cost
This is the core service fee for putting your board together. The calculation is straightforward but depends on your order volume.
A. Engineering Fee (NRE)
For prototype or small-batch runs (typically under 2,000 pieces), a one-time Engineering Fee is applied to cover programming, stencil (solder screen) creation, and production line setup. For larger production runs, this fee is usually waived.
B. Calculation by “Point”
SMT assembly cost is primarily calculated based on the number of “solder points” on your board.
What is a “Point”?
SMD Components: Two pins equal one point. For example:
Resistor, Capacitor, Diode (2-pin) = 1 point
Transistor (3-pin) = 1.5 points
Integrated Circuit (IC): 4 pins = 1 point
Through-Hole (DIP) Components: One pin equals one point.
The total number of points is calculated from your BOM and PCB layout. The SMT assembly fee is then:
Total Points × Price-Per-Point
The Price-Per-Point typically ranges from $0.0015 to $0.0022 .
What’s included? This fee generally covers all standard SMT consumables like solder paste, glue, and fluxes.
C. Other One-Time Costs
Solder Stencil: Essential for solder paste application.
Test & PCBA Fixtures: Custom jigs for ICT (In-Circuit Test) or FCT (Functional Test).
Any other specially agreed-upon tooling.
4. PCBA Testing and Final Assembly Cost
A reliable manufacturer ensures your boards work correctly. This phase incurs additional costs that are vital for quality assurance.
Our Comprehensive Production & QA Flow:
SMT Setup -> Solder Paste Printing -> SPI -> SMT Pick-and-Place -> Pre-Reflow Check -> Reflow Soldering -> AOI -> FAI -> AI/Manual Plugin -> Pre-Wave Check -> Wave Soldering -> Depaneling -> Rework/Cleaning -> ICT -> FCT -> Box Build Assembly -> Labeling -> Final Visual Inspection -> Packaging -> QA Audit -> Shipping.
Each bolded step (SPI, AOI, ICT, FCT) represents a potential testing cost. The more rigorous the testing you require, the higher the cost, but it significantly reduces the risk of field failures.
Conclusion: Getting an Accurate Quote
As you can see, the final PCB assembly cost is a sum of tangible, quantifiable parts. To get the most accurate quote, be prepared to share your Gerber files, a complete BOM, and your expected production volume.
By understanding this breakdown, you can have a more productive conversation with your supplier and identify areas for potential cost optimization without sacrificing quality.
Ready to get a transparent, no-obligation quote for your project? Contact us today and let’s build something great together.