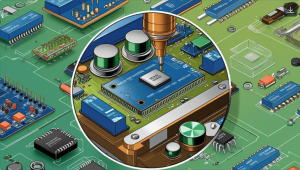
In today’s rapidly advancing world of electronics, LED (Light Emitting Diode) technology has emerged as a game-changer in the realm of lighting and display applications. LED PCBs (Printed Circuit Boards) are pivotal in powering and controlling LEDs effectively. In this comprehensive guide, we’ll shed light on LED PCBs and their significance and even walk you through making your own LED PCB board. So, let’s embark on this illuminating journey together!
Table of Contents
Our Recommended LED PCB Assembly

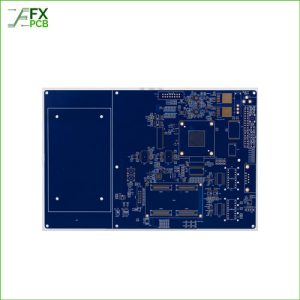
Light PCB assembly is the process of assembling and soldering electronic components onto a printed circuit board (PCB) to form a functional electronic device. The PCB material should be chosen based on factors like fire retardant, dielectric constant, loss factor, tensile stability, glass transition temperature, and Z-axis expansion coefficient. Common materials used for Light PCBs are CEM-1, CEM-3, FR-4, aluminum, and copper alloys. The material should be selected based on the specific requirements of the electronic device being produced.
Shenzhen PCB assembly manufacturer is the ideal place for your Light PCB assembly needs. We can assist you in assembling everything from industrial high-power LEDs to commercial flood LEDs.
Understanding LED PCB
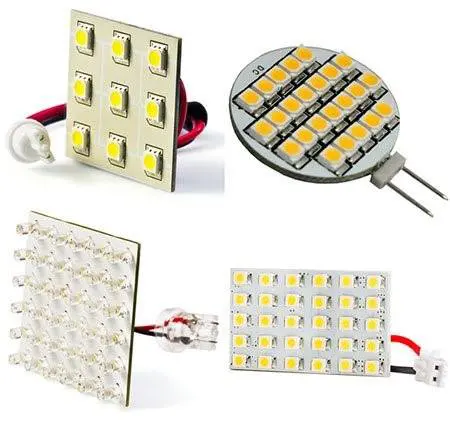
LED PCBs, also known as LED circuit boards or LED light circuit boards, are specialized printed circuit boards designed to provide electrical connections and mechanical support to LEDs. They are a robust platform for mounting and interconnecting LEDs, ensuring they function optimally to produce the desired illumination.
The Advantages of LED PCBs
The adoption of LED PCBs offers numerous advantages over conventional wiring methods. These benefits include enhanced thermal management, ensuring the LEDs remain cool during operation and prolonging their lifespan. Additionally, LED PCBs are highly reliable, compact, and energy-efficient, making them ideal for various applications, ranging from simple lighting fixtures to complex electronic displays.
Unveiling the Components of LED PCBs
The Anatomy of an LED PCB
A typical LED PCB comprises several essential components, each playing a vital role in its functionality. The key components include:
- LED Chips: The heart of the LED PCB, these semiconductor chips emit light when current passes through them.
- Substrate Material: The base layer of the PCB provides mechanical support and thermal conductivity.
- Copper Traces: These conductive pathways connect the LEDs and other components, allowing current to flow through the circuit.
- Solder Mask: A protective layer that covers the copper traces, safeguarding them from external factors and preventing short circuits.
- Silkscreen: This layer contains markings and labels, providing important information about the PCB’s components and assembly.
The Making of an LED PCB – A Step-by-Step Guide
Designing Your LED PCB
Creating an LED PCB begins with meticulous planning and designing. Determine the specifications of your project, including the number and arrangement of LEDs, power requirements, and any additional features you wish to incorporate. Utilize PCB design software to craft a schematic representation of your LED circuit.
Choosing the Right Materials
Selecting high-quality materials is paramount to the success of your LED PCB. Opt for a suitable substrate material, such as FR-4 fibre glass pcb, which offers excellent electrical insulation and mechanical strength. Additionally, carefully consider the thickness and copper weight of the PCB to match your project’s needs.
Creating the PCB Layout
Translate your schematic design into a physical layout using PCB design software. Place the LED chips, other components, and copper traces on the board while adhering to best practices for thermal management and signal integrity.
Manufacturing the LED PCB
Once your design is finalized, it’s time to bring your LED PCB to life. There are two main manufacturing methods to consider:
- DIY Fabrication: For simple projects and prototypes, you can opt for DIY fabrication using etching techniques. This involves transferring the circuit pattern to a copper-clad board and using chemicals to etch away the excess copper, leaving behind the desired copper traces.
- Professional PCB Manufacturing: Professional PCB manufacturing services are recommended for more complex designs or mass production. These companies utilize advanced manufacturing processes, such as lithography and etching, to produce high-quality PCBs with precision and efficiency.
Soldering the Components
Once you have your LED PCB board, it’s time for the assembly process. Carefully solder the LED chips and other components onto the board, following your designed layout. Exercise caution to avoid solder bridges and ensure secure connections.
How to Make LED PCB Board – A DIY Guide
Step-by-Step Instructions
Creating your own LED PCB board can be an exciting and rewarding project. Here’s a step-by-step guide to help you get started:
Step 1: Design Your LED PCB:
Using PCB design software, create a schematic for your LED circuit and design the PCB layout, considering component placement and signal flow.
Step 2: Choose the Materials:
Select a suitable substrate material and copper-clad board based on your project requirements.
Step 3: Transfer the Design:
Print your PCB layout onto a special transfer paper and transfer it onto the copper-clad board using a heat press.
Step 4: Etch the Board:
Immerse the board in an etching solution to remove the excess copper and reveal the copper traces.
Step 5: Drill Holes:
Drill holes on the board to accommodate the LED chips and other components.
Step 6: Solder the Components:
Carefully solder the LED chips and other components onto the board, ensuring secure connections.
Step 7: Test Your LED PCB:
Connect your LED PCB to a power source and test the LEDs to ensure they light up correctly.
Conclusion – Illuminating Your Path in LED PCBs
Congratulations! You’ve now comprehensively understood LED PCBs and how they are crafted. Whether you embark on a DIY LED PCB project or rely on professional manufacturing services, you are now equipped with the knowledge to light up your world with custom LED circuit boards. So, unleash your creativity, and let your LEDs shine bright!
FAQs About LED PCBs
H3: What is the purpose of a solder mask on an LED PCB?
The solder mask is a protective layer, preventing solder bridges and ensuring that solder only adheres to designated areas during assembly.
H3: Can I use a single-sided PCB for my LED project?
Single-sided PCBs are suitable for more straightforward LED projects with fewer components. However, for more complex designs, consider using double-sided or multi-layered PCBs.
H3: How can I improve the thermal performance of my LED PCB?
To enhance thermal performance, use a metal core PCB (MCPCB) or add heat sinks to dissipate heat more effectively.
H3: Are LED PCBs only used for lighting applications?
While LED PCBs are widely used in lighting applications, they are also utilized in various other fields, including automotive, medical devices, and consumer electronics.
H3: Can I rework or modify an already assembled LED PCB?
Yes, rework is possible, but it requires careful desoldering and resoldering of components. It’s best to avoid rework to maintain the PCB’s integrity whenever possible.