Imagine a situation when your circuit board works perfectly in one minute and stops working in the next minute. When this happens, the likelihood chance is broken or damaged wiring of the printed circuit board.
So, what’s the fix then?
Well, you can quickly re-solder wires of the PRC boards and LEDs to avoid expending on buying a new circuit board. But for this, you effectively need to know how to re-solder wires to the circuit board.
Don’t worry; the process isn’t insensitive. We will show you how to re-solder circuit board wires using circuit board soldering iron and without solder.
So, shall we begin?

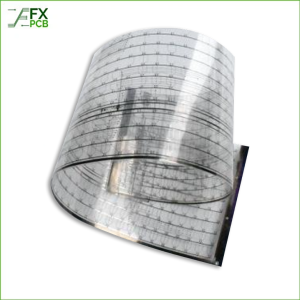
Copper base PCBs are the most demanding and expensive of all the three types of printed circuit boards. It got the name because the circuit board substrate is made of copper. The use of copper makes these circuit boards highly thermally conductive and versatile.
The copper foil used as the substrate typically has a thickness of around 35μm~280μm. Its thermal conductivity is further assured with the use of aluminum oxide and silicon powder. The manufacturer also usesepoxy resin to connect the substrate and the leading copper circuit. The epoxy resins are often filled with polymer for the secured connections.
Before we get to the main point, eventually, we would like to suggest useful tips. The re-soldering of wires on the circuit board is similar to what we know about how to solder the electrical wire to the circuit board.
So, you shouldn’t face many issues with the re-soldering process. However, if you have forgotten the soldering process, we will recap the process for re-soldering the damaged or cracked circuit board wires.
Things you will need:
Once you are ready with the gears, you can start your re-solder or solder wire to the PCB pad successfully. The steps are:
Working with soldering iron is a risky process since the soldering iron can get heated up to 800°F, and it is not fun. So, you need to be ready with proper gear. Also, don’t touch the soldering iron tip even with the gloves on to avoid accidents.
The key to effective re-soldering lies in preparation. It begins with close inspection and methodical restoration of the wire’s original alignment. This step involves more than just making a superficial connection. It is about precision, attention to detail, and setting the stage for a successful soldering process.
Begin by examining the circuit board meticulously, paying particular attention to the damaged or broken section of wiring. Knowledge is power, as they say, and having a clear mental map of the wiring landscape will put you in good stead for the steps ahead.
Now is the time to switch it. As it heats up, focus your attention back on the damaged wire. Handling the disconnected ends carefully, twist them together until they reconnect. This is a delicate process – you’re not trying to knot a shoelace here, but reestablishing a vital link in a complex electrical system, with care.
With the disconnected wirings now connected, it’s important to secure them temporarily. This is where a plastic stick comes in handy. Use the stick to hold the twisted section, ensuring the wires remain in contact. This step reduces the chance of the wires separating during the soldering process, ensuring a more stable and reliable reconnection.
As the soldering iron reaches its working temperature, carefully bring its tip close to the twisted wires. The soldering iron should touch the twisted wires just long enough to heat them but not melt them. You will need to stay steady for this part. Start by applying the heat from 2 seconds onwards as much as 10 seconds.
If you notice the wires taking an unwelcome turn towards melting, Swiftly draw back the soldering iron, and let the situation chill out and let the wires cool down. If this happens, surely you’ll have to try again. Remember, re-soldering is a process that demands patience and perseverance.
With the wires adequately heated (usually indicated by a small amount of smoke), it’s time to apply your solder. Bring the solder into contact with the heated wires, and let it flow into the joint. Maintain this contact until the re-soldering looks complete – but don’t rush it. You’re aiming for a solid, robust connection that won’t break down again.
The final step is to remove any extra solder from the board after it’s not hot anymore. Although you might think that you’ll get it right the first time, that is not true. But dont get frustrated and know that you can attempt it multiple times without damaging your board.
When you know how to solder and re-solder a wire on the circuit board, you can ardently move to the next steps. Yes, we will now talk about how to solder LEDs to the circuit board. You will need a heat adjustable soldering iron for the process. The soldering iron tip also needs to be smaller in size.
When you are ready with the LED and circuit board, heat the soldering gun at 675°F. You should load the circuit board on an alligator clip to avoid a direct connection with it. Use the heated soldering iron tip to reach the required temperature both on the LED and circuit board side.
Once you have adequately heated both components, you need to create a small cracking between the metal pad and the leads. Then wait for two to four seconds briefly, and pour the solder on the crack. Once the solder is melted and appropriately poured on the damage, remove the soldering iron and the solder itself.
The LED and circuit board will easily get soldered.

If you don’t ardently have a soldering iron or gun readily available at home, you may think to repair the circuit board without solder. It is an inexpensive and straightforward process. You can opt for multiple options to connect the wires without solder in a circuit board.
Alligator clips are cheap and readily available in hardware or electric shops. You need first to strip the two wires end to connect them using the clips. Once the striped wire ends are accommodated in a parallel form, use the alligator clip to join them.
The use of an alligator clip for joining circuit board wires is a temporary solution. It is also the weakest of all wire connections and will often come up with loose joints frequently. Hence, you may want to seek a stronger and permanent wiring method.
Electrical tape to connect wires on a circuit board is another inexpensive and effortless method of joining wires. Also, you can quickly get the electrical tapes in a hardware shop.
Twist the two ends of the wires and wrap them using the electrical tape. The method is suitable for permanent wire connections. Also, it is widely practiced for insulating joints to ensure safety.
You can alternatively use a crimping tool or hot glue gun to create a permanent connection of the stripped wires.
When you know how to re-solder wires to circuit board, it can save you a fair amount of money. Also, it helps your device to get an increased lifetime. Therefore, we have ensured that our described methods of re-soldering the damaged wires on the circuit board come in handy for you.
Also, we have highlighted ways to joint wires without solder for further convenience.
Related Tag: Glass PCB

I am Peter Gong. I have been working in PCB and PCBA industry for 15+ years now. I have been a part of the PCB revolution with my dedication to circuit board technologies and creative ideas. I write in FX PCB to impart my knowledge on PCB and PCBA for all circuit board lovers, manufacturers, and users.
WhatsApp us