A capacitor is a basic component of a circuit board. It is responsible for storing electrical energy to help the device work properly. The capacitor may get damaged or blown away due to excessive or overvoltage.
At this point, you must replace the capacitor to help the circuit board work properly. In case you don’t know how to replace a capacitor on a circuit board, we are here to help you.
A capacitor contains electrolytes and it can spill or burst. It will then spread the electrolyte over the entire circuit board. You have to replace the damaged capacitor then. Luckily, the process of removing and replacing the capacitor on a circuit board is easier than most people imagine.
The following tips will help you in this regard greatly.
Our Recommend Products

FX PCB is a manufacturer to provides full turnkey PCB assembly manufacturing services in China, we not only just manufacture the PCB and do the assembly, but we also have an experienced sourcing team to purchase the components to save cost and time for our customers. You can all get the best turnkey PCB Assembly service (PCB+Components+Assembly+Test) from FX PCB.
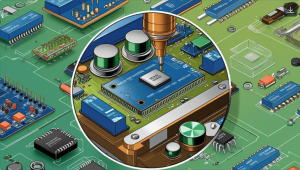
How To Replace A Capacitor On A Circuit Board
Replacing a blown-out capacitor within a few dollars is way cheaper than installing a new circuit board for your computer or other electric gadgets. Thus, knowing the technique to replace a blown-out or damaged circuit board capacitor is a money-saving deal.
Step 1: Know when to replace the capacitor
Usually, a damaged capacitor will signal different mischievous properties. Thus, these signals work as an early alert for you to prepare for replacing the capacitor.
- The screen of your device shoes irregular lines
- Sometimes you will see flickering on the screen
- The device will switch on and off irregularly
- You can’t return the device from its standby mode
- At the worst, the device won’t turn on
Since the capacitor stores and releases the essential energy to run any device, slight damage can lead to the distortion or damage of your entire device. So, replacing the capacitor is a must.
Step 2: Arrange the tools for capacitor replacement
When you witness one or more signals of a damaged capacitor that we mentioned above, you need to prepare to replace the unit. Thus, you will need the following accessories:
- A tool to open the device casing. Preferably, you should use a HEX wrench or screwdriver.
- Soldering iron and mask
- The new capacitor ( you have to match its value with the existing capacitor)

Step 3: Access the damaged capacitor
Once you are ready with all of your tools to remove and replace the blown-out capacitor, it’s time to jump into the working steps directly. First, turn off your device appropriately. Then, unplug it correctly from the main electrical outlet for safety purposes.
Now, you need to access the circuit board. For this, open up the casing using the HEX wrench or screwdriver. Make sure you have kept the screws in a separate place safely so that you may access them whenever necessary.
You may check the user manual if you are having trouble opening the device casing and accessing the circuit board. Once you have found the circuit board, bring it under sufficient lighting. It will help you check the circuit board capacitor properly.
You can then find the damaged capacitor with ease. A damaged capacitor may look like:
- Brownish fluid leaking from the damaged capacitor
- The capacitor will be corroded and sipping fluid
- The leads will start coming out of the capacitor
These signs will help you quickly locate the blown-out or damaged capacitor that needs replacement. Also, look at the top of the capacitor. Its top will have a convex shape and bend towards the outside which is opposite of a working capacitor.
Step 4: Remove the damaged capacitor
Before you remove the old capacitor for replacement, check its voltage, temperature rating, and capacitance accurately. It is essential since you have to replace it with an equally valued capacitor to permit the device to work properly.
Next, locate the location of the soldering point at the back of the capacitor. It would hold the capacitor. Heat your soldering iron and press it against the soldering back of the capacitor. You need to hold down the soldering iron until the capacitor gets loosened from the circuit board. Then, perform the task on the other side to loosen the wiring and remove the capacitor.
Sometimes, the joint may be covered with too much soldering. It will prevent the soldering iron from reaching the exact point. Thus, use a soldering wick to remove the extra soldering from the back of the circuit board. Then, position the heated soldering iron accurately and remove the blown-out capacitor accurately.
You don’t need to hasten the job. Do it in a relaxed mode and it will ensure maximum accuracy.
Step 5: Install the new capacitor
You have to mount the new capacitor in a way so that it maintains the same height as the older one. For this, trim the leads of your newly bought capacitor. Then, carefully position the new capacitor on the soldered holes of the old replacement.
Ensure that you have positioned the capacitor with accurate polarity(the positive and negative heads are in correct alignment). Then, heat the soldering iron and press it against the back of the circuit board right where the capacitor joint is located.
Check when the soldering tip falls into the hole. Then press the wire lead of the board through the soldered hole appropriately. The old soldering joint will securely hold the newly replaced capacitor and help it function accurately.
You have to perform the soldering task on the other side of the circuit board too. Finally, mount the circuit board into the device casing properly to finish off the capacitor replacement task.
Final Words
This is our complete guide on how to replace a capacitor on a circuit board. We hope that it will allow you to replace the damaged capacitor of your device and replace it with a new one quickly. The process doesn’t need any electrical expertise. Just make sure you do the job attentively and use the correct value for the capacitor.
If you want to rebuild your PCBA, and you can contact us today!
Related Tag: PCBA